Hot cocoa (the beverage made from ground cocoa and sugar commonly available in packets) can often be grainy, and I've always assumed that to be due to imperfect dissolving of the cocoa solids into liquid, but there should be no reason why hot chocolate cannot be prepared so it isn't grainy. Most recipes I've found bring the milk to a scalding hot temperature followed by blending chopped chocolate into the milk until dissolved. While reading these recipes, I kept wondering why the chocolate doesn't burn (or at least curdle) when melted into liquids at such high temperatures (simmering milk is about 160°F (70°C)- way above the temperature at which chocolate burns). Also, why do so many recipes call for simmering the milk for several minutes after the chocolate has been melted in? I went ahead and tested the most promising recipes and all resulted in tasty hot chocolate, but with a very fine sandy texture. After experimenting a bit, I came up with an easy technique to make the perfect cup of hot chocolate.
The principle of the technique is the same as when mixing eggs into hot cream to make a custard. If you have a hot liquid, you can't just drop the eggs into the liquid without ending up with bits of cooked egg (resembling scrambled eggs floating in liquid). Beating the eggs first and then dropping them into the liquid will only serve to create the beautiful whispy (and delicate) "flower" formations found in soups such as hot and sour soup and egg drop soup. When you have to evenly blend eggs into a hot liquid, you have to temper it (not to be confused with tempering chocolate) - a slower, but simple to execute, process where you scoop the hot liquid little by little and incorporate it into the eggs. The small amount of hot liquid added each time doesn't contain enough heat to cook the eggs that it touches and, as it is incorporated, gradually raises the temperature of the egg. I hoped using a tempering technique would solve two potential problems when making hot chocolate: (1) burning the chocolate and (2) incomplete melting of the chocolate. By starting with already melted chocolate and incorporating hot liquid little by little, I hoped to produce a hot chocolate without any graininess and, luckily, that is exactly what happens.
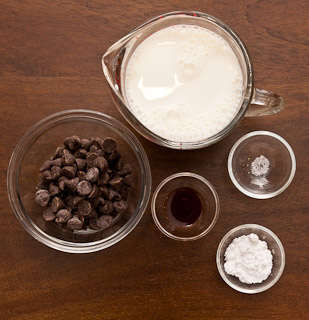 In this example, I'm preparing a single cup (a little less than 10 oz/295 mL) of hot chocolate with 8 oz (235 mL) whole milk, 2 oz (57 g) bittersweet chocolate chips, 1/4 tsp (1.25 mL) vanilla extract, a pinch of salt, and 1 tsp (2.5 g) powdered sugar.
Main Ingredients
chocolate - Select a chocolate you enjoy eating. The flavors will really come out in hot chocolate, so if you're not a fan of acidic chocolate or fruity chocolate or earthy chocolate, make sure you avoid chocolates where you detect those flavors you dislike when eating out of hand. You will be able to taste it in your hot chocolate. Also, just because you enjoy dark chocolate does not automatically mean that you'll prefer a hot chocolate made with high cacao content. I use a 63% bittersweet chocolate while Tina finds the bitter flavor to be overwhelming in hot chocolate (and normally she likes darker chocolate than I do). Be sure to use chocolate which is "pure". The ingredients should contain cocoa (or cacao) solids, cocoa/cacao butter, sugar, vanilla, and lecithin. (Sometimes, the combination of cocoa solids and butter are referred to as cocoa or chocolate liquor.) The addition of waxes and other ingredients will probably not work as well in hot chocolate. If you're using bar chocolate, chop it up into small pieces (about the size of chocolate chips or smaller) so it will melt easily.
milk, cream, or water - The liquid component of hot chocolate can be just as important as the chocolate itself. As strange as it may sound to some, water is the liquid with which hot chocolate was originally made. The flavor of chocolate is especially pronounced when melted into water and chocolate purists may prefer this type of hot chocolate. In the U.S., milk is the most common liquid to use creating a beverage that tastes like milk chocolate. Others prefer the extra body and rich mouthfeel from the use of cream (or half and half) instead of milk.
Optional Ingredients
salt - Salt often enhances sweets and can bring out subtle flavors. Using a small amount is key as you don't want to overpower the beverage with saltiness. When making one cup, use a small pinch. When making four cups of hot chocolate, use 1/8 tsp (0.75 g). If you are one of those people who can detect the salt and dislike the flavor in hot chocolate, then I'd leave it out. Tina doesn't like it, so I leave it out when I make her hot chocolate, but I enjoy a pinch of salt. Try it before leaving out this optional ingredient.
sugar - I don't find sugar necessary when using semi-sweet (50-60% cocoa) chocolate, but I add it when using bittersweet chocolate (65% and higher). Powdered sugar dissolves more rapidly in warm water, so I generally reach for that using about 1 tsp (2.5 g) per cup when using bittersweet chocolate. (If you don't have powdered sugar, also called confectioner's sugar, just use 1/2 tsp (2.1 g) granulated white sugar instead.) Powdered sugar also contains a little bit of corn starch, but such small amounts won't change the texture and mouthfeel of the hot chocolate much. In fact, adding starch isn't a bad idea and can actually improve the flavor, balance, and mouthfeel of hot chocolate. The best hot chocolate we've ever had was thickened with masa!
vanilla and other mix-ins - I like to think of vanilla extract as a mix-in (typically "mix-ins" are stuff you add to ice cream to make it more "interesting" such as pecans in a butter ice cream to make butter pecan or marshmallows and nuts in a chocolate ice cream to make Rocky Road) for hot chocolate. As flavoring agents go, vanilla extract is a pretty common mix-in for hot chocolate, but this is where you can really get creative. You can substitute with peppermint oil (try using 1/4 tsp (1.25 mL) for each cup; like vanilla extract, the actual amount you want to use can vary depending on the potency of the extract). Or, try adding a cinnamon stick, orange zest, rum (or favorite alcoholic liquor), or use any of the flavor you enjoy when eating chocolates.
Precedure
I decided to photograph this recipe while preparing it all in one cup. You can prepare the hot chocolate in a measuring cup or any other vessel and then pour it into the final serving cups for the prettiest results. When making more than one cup, it is easiest to work in a larger vessel and just pour into each cup for service.
Heat the milk to 120°F (50°C). I just microwave it in the measuring cup. Takes about one minute in my microwave starting at refrigerator temperatures. (I ran several tests including bringing the milk to a rolling boil and the actual temperature of the milk doesn't really matter [as long as it was not cold] since we slowly temper it into the chocolate. However, clean up can be a little more painful when the milk is heated to too high a temperature because the milk solids can form a skin and then cling to the side of the pot and cook on to it like drying glue. There's no need to heat the milk too much, it just has to be hot enough to keep the chocolate melted. Cold milk will cause the melted chocolate to immediately harden back into a solid, so that's why we heat it up.)
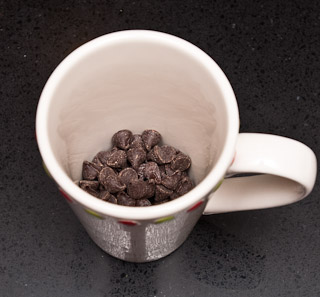 Place the chocolate into a cup or bowl.
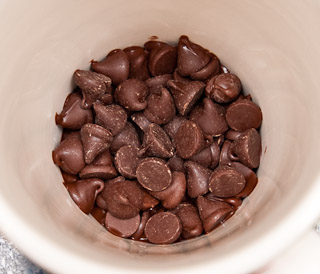 Melt the chocolate. Using a microwave oven is the easiest method. Run the microwave oven in short bursts until you get the hang of how your microwave oven heats chocolate. (I recommend in intervals of 10 sec at a time the first time you try this.) Stop heating once the chocolate looks like it might be glistening and the edges are beginning to melt. Residual heat will melt the rest.
Alternatively, you can melt the chocolate by setting your bowl or vessel over another container with just boiled water (with the heat turned off) making sure the bottom of the bowl does not come into contact with the hot water. The gentle steam rising from the hot water should warm the container holding the chocolate and melt the contents as you gently stir. Remove the chocolate vessel as soon as the chocolate is melted to prevent burning (dark chocolate can burn at temperatures as low as 125°F [52°C]).
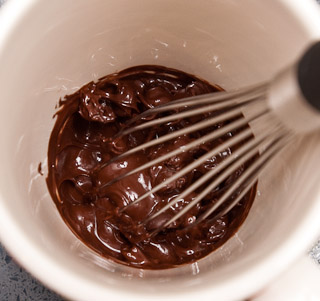 Stir the chocolate with a whisk to assist in the melting.
 It's helpful to use both a whisk and a small spoon. If you're making hot chocolate directly in the serving cup, it will often be the case that the whisk cannot effectively reach the bottom interior edge of the cup. A small spoon will effectively scrape up that chocolate and you can then use the whisk to blend it into the rest of the mixture. You'll want to routinely scrape that ring with the spoon throughout the hot chocolate making process.
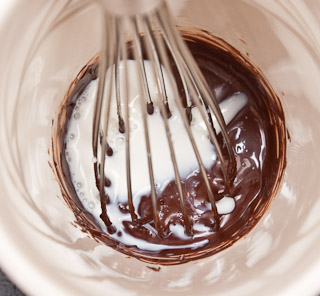 Use another small spoon (a teaspoon is great for this role) to transfer one spoonful of milk to the melted chocolate.
Whisk it in.
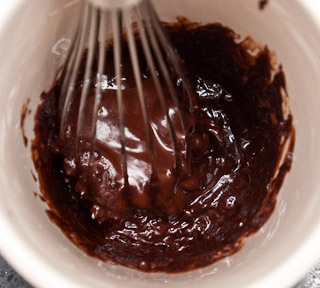 The chocolate might turn ugly now or with the next spoonful. It will darken, clump up, and become difficult to work with.
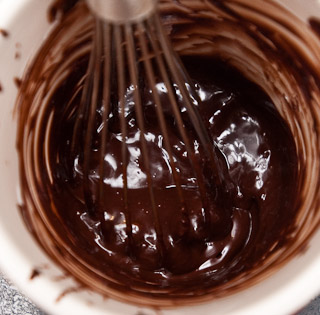 Clear the whisk with the chocolate spoon (the clumps of chocolate will get lodged inside the whisk, just pry them out with the chocolate spoon). Scrape the interior bottom edge, clean the chocolate spoon with the whisk, and whisk the mixture as best you can. Add another spoonful of milk and repeat until the mixture begins to loosen up and become more fluid.
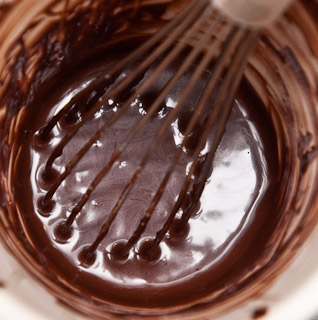 Now you can begin to add milk faster. Scoop two or three spoonfuls at once and whisk in. (Gradually work your way up - first two, then, if it's easy to incorporate, three.)
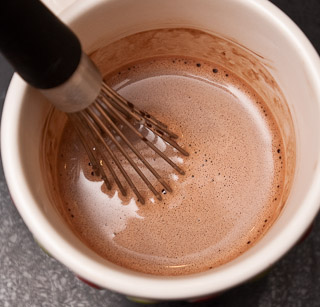 Once you have incorporated nearly 2 ounces (60 mL) of milk (about 10 or more spoonfuls of milk), you can begin to pour and whisk 1 to 2 ounces (30-60 mL) of milk at a time into the chocolate. When you have whisked in a total of 6 ounces (175 mL) of milk into the chocolate, this is a good time to stop and clean up any mess you might have made. I use a small piece of paper towel to wipe the rim of the cup in case I got chocolate on it while whisking (which I did when photographing these steps).
 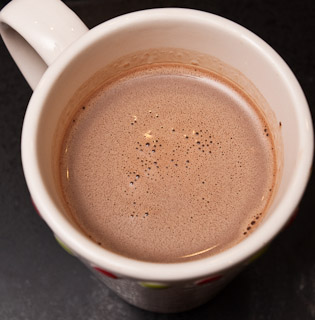 Add the optional ingredients (salt, sugar, and any mix-ins you might want) at this point. Whisk the mixture gently until everything has dissolved and appears fully integrated. Pour the remaining 2 ounces (60 mL) of milk into the hot chocolate and whisk one final time.
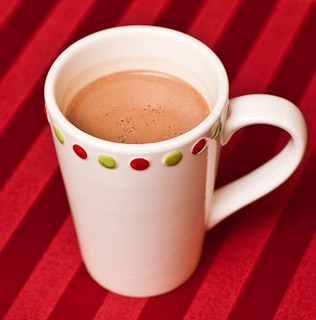 At this point, you can serve the hot chocolate (which should be still warm) or heat the hot chocolate without fear of burning the chocolate. I like to microwave mine until it is piping hot so I have to sip it slowly.
Perfect Hot Chocolate (serves 1)
| 8 oz (235 mL) whole milk | heat until warm (120°F/50°C) | whisk into chocolate slowly until 6 oz (175 mL) incorporated | whisk | heat to desired temperature |
| 2 oz (57 g) bittersweet chocolate chips | melt | |||
| 1/4 tsp (1.25 mL) vanilla extract | ||||
| 1 tsp (2.5 g) powdered sugar | ||||
| pinch of salt | ||||
Perfect Hot Chocolate (serves 4)
| 1 qt (945 mL) whole milk | heat until warm (120°F/50°C) | whisk into chocolate slowly | whisk | heat to desired temperature |
| 8 oz (227 g) bittersweet chocolate chips | melt | |||
| 1 tsp (5 mL) vanilla extract | ||||
| 4 tsp (10 g) powdered sugar | ||||
| pinch of salt | ||||