Dulce de leche (pronounced DOOL-say day LAY-chay) is Spanish for "milk candy" (word for word it is candy of milk). It tastes quite like caramel but with the additional taste of cooked milk. (Technically, dulce de leche is a type of caramel.) It's often used in liquid form as a sauce for ice cream, cakes, cookies, just about anything that needs a sweet topping. In solid form, it is most often eaten as a tasty candy.
Related Articles
- The label on the can should be removed if it is made of paper so it doesn't fall apart in the pot of water over the hours of cooking time.
- The can should have a couple holes popped into the top (using a can opener). This is important as it helps prevent the can from exploding.
- The can should be placed in a small pot and water added until it is near (1/4 in. or about 1 cm) the top of the can.
- The water should be brought to a simmer (not boiling) and held there for three hours (for thick runny dulce de leche) or four hours (for solid dulce de leche). Water will need to be added over time as it cooks off.
- Remove the can with tongs and allow to cool before opening.
- Cooked in the can, the dulce de leche will have different consistencies - liquidy on top, dark and crusty on the bottom. Stir together in a bowl until it is uniform.
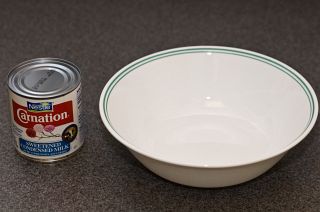 This recipe also uses sweetened condensed milk as a starting point. Here's a 14 ounce (396 g) can. I'll discuss how to make your own sweetened condensed milk (if it's not available in your area) in a later article. Remember sweetened condensed milk (Ingredients: milk, sugar) not evaporated milk (Ingredients: evaporated milk).
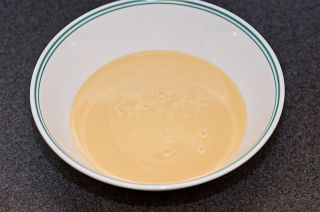 Just pour the sweetened condensed milk into a large microwavable bowl. The bowl shown here isn't quite large enough (see what happens), so get a big microwavable bowl. (It is possible to do this recipe with a bowl this size, but I wouldn't recommend it on your first try or on a microwave oven where you haven't used this technique before.)
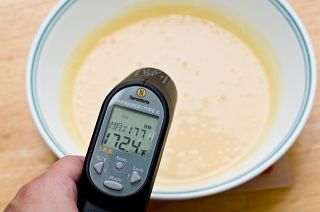 Stick the bowl with the sweetened condensed milk into the microwave oven and cook it on medium for two minutes. Take the bowl out of the oven. Be careful - the milk heats up pretty fast so the bowl could be hot.
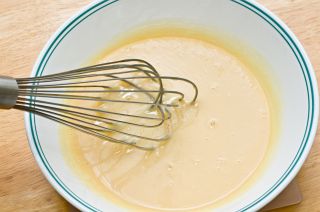 Using a wire whisk, stir the sweetened condensed milk and put it back into the microwave oven to heat for another 2 minutes on medium.
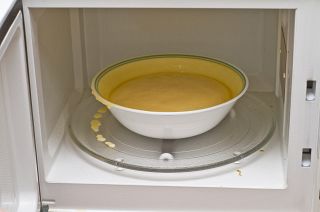 It's important to keep a watch on the bowl as it cooks in the microwave oven. If heated continuously (for example, on high), the milk will begin to bubble and the viscous liquid will trap the bubbles to form a heavy foam that sticks like hot napalm. That's one of the reasons why we run the microwave on medium instead of high. A microwave oven generally has only two modes - on and off. High means the microwave is continuously on, but a medium setting will cycle of microwave oven on and off every few seconds. The off periods help prevent boil over. If the bowl boils over, clean up the mess, upgrade to a larger bowl and continue.
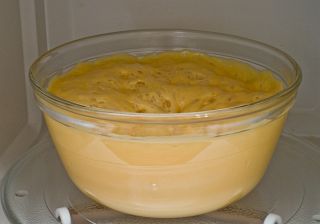 Here I've moved to a 2.5 quart (2.5 L) borosilicate glass bowl and took a picture right after about 40 seconds of high power to show the foaming. The foam subsided rapidly, but you can imagine how high it was domed.
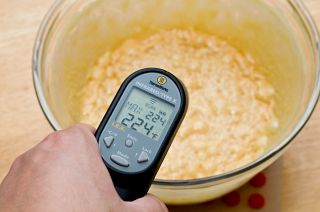 Every two minutes, pull out the bowl and whisk until smooth. Then heat again. At some point (around 10-12 minutes into the heating depending on the strength of your microwave oven), the milk will look like it has curdled.
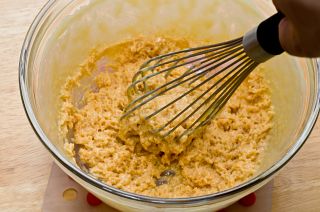 At this point the dulce de leche is ready, but not yet at the candy stage. Don't worry about the appearance, it'll smooth out when we whisk it.
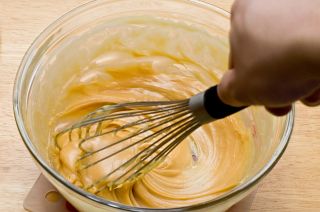 If you're going to use it as a sauce, whisk until smooth and stop here - you're done.
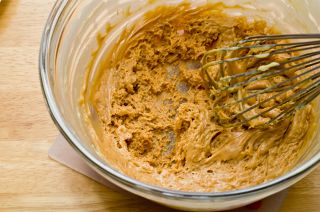 Continuing to cook the mixture will result in an even more curdled appearance. When you whisk it, the dulce de leche will pull away from the bowl as you stir it.
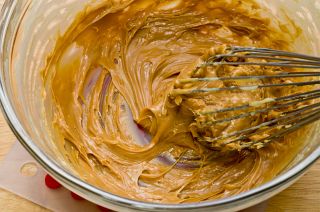 Whisk until smooth - it'll stick together and be difficult to remove from the whisk. While hot, it will still flow, so it's possible to knock most of it out of the whisk into the bowl.
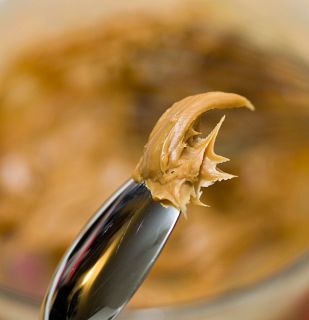 Using a spoon, you can pick up a piece of the sticky candy. The bit that comes up with the spoon should standing up (or down depending on how you orient your spoon) and cool quickly. As it cools, you can touch it and it should be tacky but not sticky or cling to your skin (be careful since it can be quite hot). Once it cools a bit, it's probably easier to simply pull the dulce de leche of the whisk than to try to knock it off. (Remember, be careful. It can be very hot.)
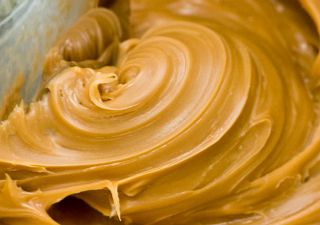 That's it! Dulce de leche with only about fifteen minutes of total prep time. This candy will store in an airtight container in the refrigerator for over a month.
For something as simple as this, the tabular recipe notation doesn't really make sense, but here it is anyway.
Dulce de leche (makes about 1 cup or 200-250 mL)
| 14 oz. (396 g) can sweetened condensed milk | pour into large microwavable bowl | heat on medium for 2 min. | whisk | repeat until appears curdled | whisk |
Related Articles

this sounds good. when i was a kid i used to like eating condensed milk by itself.
If you're cooking it until it's a solid candy, I'd spread it out on a sheet of parchment paper, wait until it's solid, cut it and wrap in plastic wrap or candy wrapper. If it's liquid, then you can put it in the mason jar, no problem. The issue though is if you over cooked it and it solidifies in the jar - it's going to take a long time getting the dulce de leche out of that.
Good call on the dough whisk. I should point out that cleaning the utensils and bowls afterward was really easy a five minute soak in hot water and it all dissolved. Didn't even have to scrub.
At home we use a pressure cooker to boil the can and time reduces a lot, it takes 40/50 minutes.
You can also spread it on a chocolate cake!
Enjoy!
1. If you love this stuff, do several cans at once.
2. Don't pierce the cans - they will not explode.
3. Use a big pot with a close-fitting lid, and more than enough water to cover the cans (you can't do this if you pierce them).
4. Sit the cans on a little rack or a crumpled piece of foil so they are not resting on the bottom of the pot. Sitting the can directly on the bottom of the pot lets it get too hot on the bottom; that's probably why yours weren't evenly cooked. Mine are always very uniformly golden
5. Nothing terrible will happen if the water level falls below the tops of the cans. Keep the heat low and check once in a while.
6. 2-3 hours works well for me, depending on how caramel-y I want it.
7. Because the cans haven't been pierced, you can put the surplus cans of dulce de leche back in the cupboard, where they'll keep for months more.
Then add, if you like, vanilla essence. The result is a soft sweet brown creme...and a sore arm!! :P
About the pronunciation, is: dool- ce (like decelerator) -de (like denim ) -le (like legitimise) -che (like cherokee)
Bye and Happy Holidays for all of you!!!
I make tapioca pudding following the tapioca box recipe but I use NO sugar and put the dulce in a measuring cup and then fill with mil up to the amount called for in the recipe. It turnes out GREAT.
Try dulce de leche between the layers of a cake and on top of cheesecake! If it is hard to spread, it can be extruded with a cookie/frosting press to get it where you want it without wrecking the cake.
Keep them intact and then, as said earlier, store them in the cupboard.
I put 8-10 cans into a jam pan of water, and brought it to the boil then moved it into an oven at about 100-110C, and left it for at least 4 hours. This way there's no risk of the cans burning on the bottom of the pan.
There IS a drawback. The steam generated soaks into any crud you have on the walls of the oven, and then seeps out as a sort of horrible caramel liquor. Be Prepared. But it is a way of making a large batch of Dulce de Leche.
Now, you dry the tins carefully and store them in the cupboard. Over the course of a few months, the now-cooked sugar will start to crystallise and when you open the cans you have a lovely crunchy base for something like a banoffee pie.
Put the can in a pan with enough boiling water to cover it, and just leave it boiling, that's it. :) I left mine for 2 hours and it was perfect, but if you use a less dense sweetened condensed milk, it might take longer.
The only thing you have to do is check up on it every once in a while to put more water in, if too much has evaporated so it's always covered.
I was trying to shoot for something of the consistency of cajeta, which is still kind of runny. My fault; I was judging by color and not consistency. Definitely will try this again!
http://www.bigredkitchen.com/2008/07/rogel-de-dulce-de-leche.html
sounds good
"gagafordulcedeleche"
"tvlgtrfls"
9 yolks
9 table spoon of oil (canola or corn)
9 table spoon of flour
put in the working table the flour like a ring, then put in the middle the yolks and the oil and start to mix.
form 6 little balls and let them rest under a table cloth or similar for 30 minutes.
flat them with the roling pin in a circular form, very thin, mark it with a fork and cook on a medium oven 3 minutes each side (they shoul look cook but still white).
then for the italian merengue you can use any recipie... the most conventional is 3 egg whites, 1 cup of sugar litle water, just enough to wet the sugar. you have to ccok the sugar to "firm ball" consistence.
Start to beat the whites, and add this cook sugar very slowly... continue beating until the bowl is cold.
here is a picture: http://3.bp.blogspot.com/_jCNDh0FNybY/SLLuXWUhN_I/AAAAAAAAAFk/HZVDNDwihzk/s16...JPG
the condense milk can of dulce de leche is way to far with the traditional milk and sugar cook, but it takes to long to cook the milks... so if you cant buy a store dulce de leche, the condense milk its fine...
here is alink to real dulce de leche recipie: http://allrecipes.com/Recipe/Dulce-de-Leche/Detail.aspx
and its right, all the "y" at the end of the pronunciation are wrong! you can say dulce "the" leche
I don't think Michael means for you to pronounce the Y part of "say" "day" and "chay"... althought "chay" isn't a word, "say" and "day" are and it seems pretty clear how he's suggesting we pronounce it. In your part of the world, is "say" and "day" pronounced with a "y" sound? In American English (whether or not it's "correct") we pronounce it with a simple long a sound (no "y").
Use a very thick dutch oven type pot--we used the bottom of a pressure cooker that we had lost the top.
Turn the heat on med hi and put in 6 heaping tablespoons of white sugar and not quite 6 tablespoons of water--just enough to moisten the sugar and let it spread out so it will dissolve into the water base. Ok, if you want more, sure you can make it with 1/2 or 1 cup or even 2 cups of sugar if you want--it's just gonna make it harder and kill you faster. Experiment with what you like best, but we minimized the sugar and water because the condensed milk has both, and cooked it longer.
So stir until the sugar is bubbling all over and drops clear from a very long handled spoon. You don't want to get this on you, it's very painful! The trick is to not let the sugar stick on the bottom of the pot, not to get burned, and not to overcook it or have sugar crystals appear all over. You can use a candy thermometer, but that takes all the fun out of it. I don't know what the temp would be--somewhere just beyond softball stage but before hard.
Stir in a can of condensed milk (it's sweetened--not evaporated). Then squeeze in a packet of liquid bitter or semisweet chocolate, or a square of same. If you want it really dark put 1 more in. Stir really well until the whole thing is really starting to get dark and thick and the bubbles are large and popping. You may have to turn the heat down to med.
Drop small spoonfuls into a bowl filled with ice water every few minutes as it starts to get dark. Try to form small balls and pick them up with one hand in the ice water, while stirring the pot with the other that's getting overheated--it's fun! If soft balls form, it's getting done. When the sides of the pot scrape white, it is done.
While you're stirring, it's inevitable the phone will ring, someone will be at the door, your kid will fall down, your husband will have a crisis, someone will die on tv, whatever. You'll either have to keep stirring or take it off the burner. Do not leave it on the burner or unattended. It will cause a fire or burn someone very badly. And make sure your pot handle is not reaching over the edge of the stove or your kid will really get scarred.
Not that this happened to anyone I know of course, but you can see how it could. So anyway, after it's ready, then
Drop in a block of butter and stir in good, then stir in a teaspoon of vanilla extract (if you cheat on this or the butter it won't taste good--it'll have an aftertaste). Then pour into a 13x9 in rectangle baking pan that has been prebuttered and already sitting on a rack. Do not get this on you, it burns even worse than before you put the butter in.
If you want nuts, either stir them in after the vanilla, or spread them on the bottom of the buttered pan and pour the fudge over them--this is a good trick for making one half of the pan with nuts and one half not--for those that don't want nuts and you're forced to share. Pecans or walnuts, depending on what you like. I like pecans cuz I'm southern.
When it cools enough, cut it into l" squares with a buttered knife. If you make em bigger they'll just make you sick. You're gonna end up eating 2 or 3 every few hours anyway until they're gone or someone else snags em, so make them little so you won't feel so guilty. And they're great with that morning java. You can even cut down on the sugar in the coffee!
And if you mess it up, and it's too soft, then you have the perfect center for popcorn balls. Just leave it in the pot, you may have to add a little more butter to keep it soft, and then make the popcorn. Drop 2" balls into the popcorn bowl, and roll around, one at a time, until you can pick the ball up with your hands. Just put them on some wax paper or something til they harden up a little. Yummee.
Cleanup? The kids love scrapin the pot when it's cool. Then just put soapy water in it til the rest comes off. If you burn yourself while you're making it, just take an ice cube out of the bowl of water and put it on the spot while you keep stirrin. It'll keep the scarrin to a minimum. If you really can't handle it, then take it off the stove until you can get over the pain. But chances are the fudge won't make it and then you'll have that scar for nothing. So you might as well keep stirring and get some fudge outta the deal!
We didn't have tv when I was a kid and we made all of our baked goods and desserts, including fried donuts. No wonder we all have diabetes and heart disease lol. Enjoy! :P
Does it take a long time? Yup. But you don't have to tend to it, and you wake up the next morning with creamy, sweet goodness to drizzle or spoon over your waffles. =)
But, then again, alcohol was involved in this massive faux pas.
My mom always wondered what the odd little splatters on the kitchen ceiling were.
:D
Its basically the same thing, with a different kind of sugar, called "panela"
it is basically "raw" sugar but you need to use the traditional recipe (unless you find condensed milk made with panela) which is boiling 2 lt milk and then adding 2 lb panela, mixing it until it acquires the desired consistency. (takes 2-3 hours of mixing)
also
adding corn starch to the mix makes it a delicious dessert
add it just when milk boils (traditional recipe)
for the "easy" (cheap :) ) recipe add it when the condensed milk starts to boil and mix for 20 minutes (or less)
ehm sorry for the bad english :(
I did this a second time, and tried microwaving it for less time so it wouldn't be as solid. I got a better consistency, although it was still quite solid. And not brown at ALL. A very yellowish-white, still. Still tasted like condensed milk, too.
Fortunately, I was able to salvage both messes by making dulce de leche the old fashioned way. I put the hardened condensed milk, evaporated milk, and water in a pot on the stove, and mixed on medium low heat until the whole thing thickened. My solid blocks of condensed milk eventually dissolved into the mixture and I got beautiful brown dulce de leche.
I was so disappointed with the results of these. Must be my microwave oven. :(
What were the ingredients of your sweetened condensed milk? It should just be milk and sugar. I've seen some sweetened condensed milk with strange additives - if you've got one of those it might affect the microwaving.
I just tried this method, the method worked perfectly, but at the end, it doesn't taste like dulce de leche. It tastes more like caramel, or some milk candie, but not dulce de leche. Sorry, but the taste from dulce de leche is different. And I am not talking about Brazilian dulce de leche, because I have also tried the Argentinian one which is the best.
For a dulce de leche you have to cook the condensed milk can in a pressure cooker for 50 minutes as mentioned before, or for some hours if not using a pressure cooker. Or, there is a method I've seen and tried from David Lebovitz's blog, that is made in the oven that also works great, and it takes about 1 hour: http://www.davidlebovitz.com/2005/11/dulce-de-lechec/
Thanks a lot :)
1 can sweetened condensed milk
1 can evaporated milk
Not the condensed milk can is smaller than the evaporated milk can.
Pour both into a sauce pan and heat until boiling, stirring occasionally
turn down heat and allow to slow boil, stirring occasionally.
After about 30 minutes it will start to darken and thicken.
Keep boiling and stirring often enough to keep from sticking to pot.
When you stir rapidly and can briefly see the bottom of the pot, turn off the heat and cool.
That's it.
[Edited to remove a cupcake link that did not appear to leave to a cupcake recipe with dulce de leche or anything else related to this article.]
I tried the microwave method and did not have luck with it - it came out hard, still yellow and definitely not dulce de leche, although I have never actually had the real thing! I want to put this on a cake, so I want a sauce consistency. Thanks!!
I used to do the stove top method but it took forever. And we used evaporated milk with a ton of sugar and a little vanilla. I think I prefer that way over using condensed milk but that's probably because that's the way/taste I'm used to.
So I cooked this until it I could tell it would solidify but I could have easily stopped before that if I wanted it to be spreadable.
Next time, I'm going to try this with the evaporated milk/sugar/vanilla mix and see how that works. Never thought to nuke it, thanks for the idea!!
It took slightly longer that 12 minutes to get to the right state, but the microwave I was using was a bit older so that was probably it. While it was cooking it smelled oddly of cheese, but the finished result was sweet and delicious! I'll totally make this part of my repetoire.
A note on canning in general: for those of you who vent the pressure canner immediately after processing is done, I highly advise against it. If you process at fifteen pounds, the contents of the jars are also at the same pressure and if any jar has an unseen flaw, it could explode which could seriously injure you. To prevent the possibility of this happening, just turn off the fire and let it set till the pressure gauge reaches zero on its own. DO NOT pour water over the cooker! By that time the pressure in the jars will be at or very near zero also. What I normally do is can in the evening, timing it so that when I turn off the fire I'm going to bed. In the morning everything will be ready to go. Hope somebody finds some interest in this.
I used to make Manjar Blanco/Dulce de Leche by boiling an unopened can of sweetened condensed milk for at least four hours (the longer you boiled it, the thicker and darker it would become). This is the method I grew up with in Panama.
More recently, I had concerns about the possibilities of the can exploding and also wondered about the possible health hazards from metal leaching into the milk (due to long interval of boiling).
My concerns were compounded since my favorite brand of sweetened condensed milk - Eagle - now has only pop top type cans.
So . . . I started searching and came upon a really ingenious method that uses a slow cooker and Ball or Mason style jars. It is a truly ingenious method and my new go to for small gifts! I made several of these little bottles of delicious confection this holiday season.
What I did was to get Ball Jars - with seals and lids (or you can use any jar you have recycled as long as the seals and lids will fit them). I took the sweetened condensed milk and poured it into the jars, then seal tightly, place in slow cooker, and fill slow cooker with water (up to the level where milk stops in the Jar). Then you can cook it for either 4 hours on high or 6 hours on low (this is per recipe I found).
However, I like the dulce to be really thick (like consistency of peanut butter) so I actually cooked it for about 5 to 6 hours on high. The neat part about this method is that you can peek at the jars throughout the process to see how thick and dark the dulce is becoming.
The recipe I found says to lay the jars down flat and submerge in water (they had mentioned tightening very well). But I didn't want the dulce forming on the side of the jar - so I stood the jars upright and only filled water to the line of the milk (keeping an eye on it in case I needed to add more water). You have to make sure, however, that the lid of the slow cooker can come down completely - so choose your jars carefully. I tried to cook some dulce with a jar that didn't allow the lid to close completely (almost, but not completely) and it was taken forever to get results. I had to end up pulling the jar out, letting it cool and then putting it in another jar.
This method is nice 'cause you can add flavors and ingredients to vary the results. And, if what you are adding is not voluminous, you can even add it right to the can before pouring into jar - saving on cleanup. So far I have added small bits of crystallized ginger & ginger powder to one jar and cocoa and cinnamon to another jar. The cocoa jar did a weird thing and formed a sort of little mountain on top ;-) - have to find out with the gift recipient how that came out.
That is the other way cool thing about this method - after you let everything cool down, you can put a pretty ribbon on the jar and you have a wonderful & delicious gift to give a lucky recipient. I hope this information helps someone interested in manjar blanco and/or dulce de leche!
I tried that once, 15 PSI, for an hour and the consistency was barely semi-solid. Didn't taste all that good either. Used sweetened, condensed milk.
when i have time i will post some recipes of desserts with Dulce de leche.
Regards from Argentina
And I'm from El Salvador and I'm amazed at the consistency of this recipe. It's the closest I've come to getting the same consistency as the can.
The real recipe calls for stirring milk (not condensed) and sugar with a little salt and bi-carb with vanilla. You must stir this on yeat for 4-6 hours otherswise you will not get the Millard reaction which making it tasty (and change colour to a nice dark brown).
Please remove the word "dulce de leche" from this abomination.
On November 26, 2008 at 08:43 PM, an anonymous reader said...
Subject: Ur doin it rong!
You're nuts, your method is FAR more trouble than boiling the can.
1. If you love this stuff, do several cans at once.
2. Don't pierce the cans - they will not explode.
3. Use a big pot with a close-fitting lid, and more than enough water to cover the cans (you can't do this if you pierce them).
4. Sit the cans on a little rack or a crumpled piece of foil so they are not resting on the bottom of the pot. Sitting the can directly on the bottom of the pot lets it get too hot on the bottom; that's probably why yours weren't evenly cooked. Mine are always very uniformly golden
5. Nothing terrible will happen if the water level falls below the tops of the cans. Keep the heat low and check once in a while.
6. 2-3 hours works well for me, depending on how caramel-y I want it.
7. Because the cans haven't been pierced, you can put the surplus cans of dulce de leche back in the cupboard, where they'll keep for months more.